This seems to be a common question, yet with the amount of time we do it ourselves, we end up forgetting the procedure by the time we receive the next query. So for the sake of all mankind, and our sanity, here is a description of the procedure which will hopefully help you, and help us with the next query…
First things first, go to the link below and make sure you have all of the documents and software installed that it describes.
The software you will need is:
- Anybus IPConfig (this sets up the IP address).
- Hyperterminal (this configures the gateway IO mapping).
- NetTool for Profibus Master, which should come on the CD with the device (this configures the Profibus network).
Hardware that you need:
- Null modem cable.
- PC with COM port and Ethernet port.
- 24v power supply.
- Profibus RS485 cable with termination plugs (not necessary but helps with testing).
- Cup of coffee (not necessary but helps with nerves).
Once you have installed all the software, you need to make sure you have the GSD files for all the devices you want to control on your Profibus network. These can be found on the vendor’s websites.
I am Going to set 2 devices which have the following IO config:
- 4 bytes input.
- 5 bytes output.
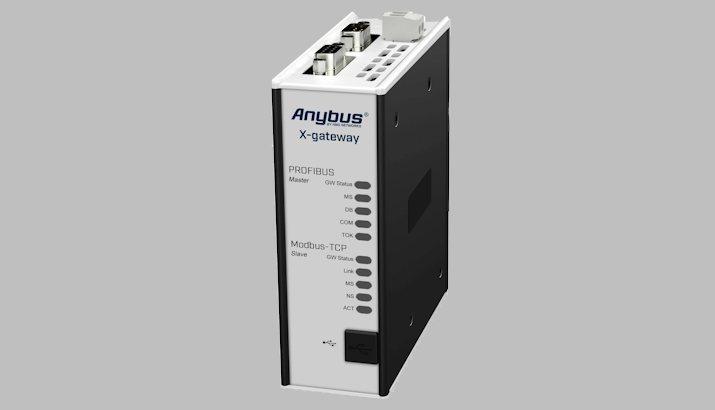
Configure Profibus Network
For a more in-depth discussion please click here.
- Connect your NULL MODEM COM cable to the Profibus Config port.
- To configure the Profibus network you must open the NetTool for Profibus. When adding the devices with their GSD files and adding all the required IO, take note of the amount of bytes being used. For example, if I have 2 devices each with 4 bytes Input and 5 bytes output, my Input max is 8 and my Output max is 10 (you need this info to enable the correct amount of Modbus Registers).
- Save your config and download it to the Gateway.
- Profibus is now configured.
(Note: Please make sure you have selected the correct COM port when configuring this section, otherwise you will pull your hair out in frustration while the system doesn’t work).
Enable Modbus Registers
- Connect your NULL MODEM COM cable to the Gateway Config port.
- Open Hyper Terminal and set up the COM port with the following settings:
Baudrate: 57600 bits/s
Databits: 8
Parity: None
Stop bits: 1
Flow Control: None - Make sure you are connected and press ESC. This should bring up the menu for the Gateway config.
- Select option “6 – Change configuration”.
- There will be a few settings that come up before the Input and Output register count, continue pressing enter to confirm the settings, or + and – to change the settings.
- When you get to Input registers you are going to allocate the amount of registers you want the gateway to expose. These registers are tied to the Read Input Register command on the Modbus Master. For our example I would set this value to 8 bytes.
- The next option is the Output registers and again this indicates the amount of output registers you want the gateway to expose.
These registers are tied to the Read Holding Register command on the Modbus Master. For our example, I would set this value to 10 bytes. - Continue pressing enter until it asks you to save the changes and restart the gateway.
- Modbus is now configured.
(Note: Please make sure you have selected the correct COM port when configuring this section, otherwise you will pull your hair out in frustration while the system doesn’t work).
Setup Network Address
- Open the IPConfig tool that you installed from HMS.
- This will scan and detect any network-enabled HMS device. Double-click on the device that has been found and set the network address you choose.
- You now have an ethernet address you can ping.
(note: if you have selected an IP range that you are not a part of, you will not be able to ping this device until you set your PC’s ethernet address to the same range).
And that’s that!
This should now leave you with a fully functioning Gateway that just works!